CAPA Cup 2019 Recap and CIS Thoughts

Battle Reports

Well, I know it’s been a long time since our last article, so welcome to the CAPA Cup 2019 recap I mentioned just a few days ago. Over the last week, I was able to build, paint, and base my CIS core sets, and put together an army to take to CAPA, in Hershey, PA, to give them an initial run. Today, I’d like to go over the list and its concepts, some quick battle reports of my three games, and some first impressions of the droids – both positive and negative. 

800/800 (9 activations)
Commanders:
 – General Grievous (175): Strict Orders (5), Aggressive Tactics (10), Tenacity (4), DT-57 “Annihilator” (12) = 206
Corps:
 – 2× Battle Droids (36): E-60R Trooper (20), Battle Droid (6), HQ Uplink (10) = 144
 – 4× Battle Droids (36): E-5C Trooper (18), Battle Droid (6) = 240
Supports:
– 2× Droidekas (100): Linked Targeting Array (5) = 210

I briefly covered this last week, but the basic premise of this list is that it functions as a Grievous delivery system. Strict orders keeps all the units moving along, tenacity ensures Grievous hits as hard as possible, and aggressive tactics (AT) and his gun are stapled to him. Considering this is a core box list, each B1 has an extra body to help with attrition rates and the droidekas come equipped with Linked Targeting Array to help add aims to their suppressive shots. I made great use of the LTA on about two turns a game, definitely earning their five points back.

Game 1

Description: https://media.discordapp.net/attachments/629380747907825665/638382950479822849/20191027_093202.jpg?width=800&height=600
Game 1 Major Offensive / Limited Visibility / Breakthrough Opponents List: Veers, ATST, 2 Snipers, 2 Storms, 1 Snow, 1 Shore, 1 Mortar

As you can probably tell from the picture, the first table was…interesting. After deployment, my opponent (Jarrod) and I were informed that the sandcrawler’s top was impassable, changing my plan of scaling Grievous over the top into his corps. We both ended up forming two flanks to oppose each other at either end of the crawler, with his snipers, shores, and ATST moving to my left side, and some snows and storms moving to my right flank. I ended up sending one droideka and 3 B1s to deal with the snows and storms, and Grievous and the other half of the army to the left flank.

We traded fire for the next two turns, with Jarrod reducing 2 B1 squads to half health and the ATST wiping a droideka, while I was able to kill 2 sniper teams and the snow troopers. Once the ATST came around the corner, I decided to dive bomb Grievous into the opponents heart on round four and wiped out Veers, and suppressed three other units. Once this happened, we spent the rest of the game moving towards each other’s deployment zones. And then, on round six, I made a huge error. After Grievous fell, I promoted a B1 to my new commander, and on turn five had moved them into melee about a quarter inch outside of the enemy deployment zone. I dropped Standing Orders….and forgot to give the commander an order, as I made a mental mistake and thought that promoting the unit removed AI: Attack. Spoiler, it doesn’t. I had to punch instead of withdrawing, and at that point lost the game 1-0. I want to give a huge amount of credit to Jarrod, he’s an awesome opponent to play against, and he ended up placing first overall. 

Game 2

Description: https://media.discordapp.net/attachments/629380747907825665/638383232844300332/20191027_131354.jpg?width=800&height=600

Major Offensive / Clear Conditions / Intercept Transmissions
Opponents List: Veers, Generic, 3 Storms, 2 Bikes, 1 Sniper, Boba

I had the opportunity to face off against a pretty “fast” list in game two, and I definitely took some casualties early. His Veers dropped maximum firepower into a B1 turn one, dealing 4 casualties and sniping a heavy weapon, and his bikes came around the top and wiped another half squad. At the end of the round, I moved Grievous twice towards the middle building and baited his Boba into charge range. On turn two, I played Grievous’s 2 pip vs the Boba flamethrower, lost the roll, and immediately lost 7 of 8 droid models. However, I was able to aim – shoot Boba with a full B1 before charging Grievous in, and wiping him out. 

On turn three, I charged Grievous into the center objective and hit five units with his 1 pip whirlwind. After eliminating the units in melee with Grievous, I was able to take some aimed B1 and Droideka shots into his now suppressed units around the middle objective, and eliminate all but one. Funnily enough, this one unit was Veers, and he was able to smack Grievous for two wounds. Our game actually ended on turn four. My opponent was also the TO and Judge for the tournament, so we frequently had to pause, and ran up to the time limit towards the end of turn four. We ended the turn scoring 3-3 and myself winning on points destroyed.

Game 3

Description: https://media.discordapp.net/attachments/629380747907825665/638383268789485588/20191027_155526.jpg?width=800&height=600

Battle Lines / Hostile Environment / Recover Supplies
Opponents List: Han, Chewie, Sabine, 2 Z6, 1 Vet, 1 Tauntaun, 1 Rotary RT, 1 Sniper

My final game was against a rebel heroes list. I was able to take a suppressive shot from the dekas and a full B1 shot into the Tauntauns round one after an unlucky pull, and spent the rest of the first two turns picking off the rebel troopers on the right hand side and claiming three of the boxes. By turn three I was hunting down Sabine with Grievous, and we ended on round four.

As you can see from the photos, I had a significant advantage from the outset of deployment. I was able to keep my army in a Range three band of itself, and focus upon three of the boxes from the very beginning. Being able to suppress the Tauntaun from the outset, and move shooting with the droid rocket trooper to suppress the Z6s on the right hand side allowed me to move shoot with my other units without fear of reprisal and create a wall around my claimed objectives.

First Impressions and Final Thoughts

I’d like to quickly go over some first impressions of the CIS. In my opinion, the droids love Major Offensive. As you can see from the first two game photos, MO lets the CIS spread out their chain and create a wall that moves towards the opponent in a wave. The perfect order control is fantastic, and I was able to maintain a “no bag” status for 12 of the 14 rounds I played, losing it only for the final two turns when Grievous died in the first match. Having eight man squads feels great, as losing three or four models feels like nothing, and ensures that you can keep the coordinate chain firing. Grievous is an absolute monster, as he single handedly eliminated 7 activations over the course of the day without assistance. The droidekas also proved their worth, as having an aim, a surge, and a suppressive weapon that reaches out to range three proves to be a nasty combination. Finally, being able to ignore the suppression action loss is priceless, and proves to be extremely effective for corp units. 

On the downside, the variance the B1 shooting offers is wild, and expecting more than a hit or two is brimming with optimism. Their defense dice are atrocious as expected, and flamethrowers absolutely annihilate them. Managing the courage two value of Grievous can be difficult, and I did have to dive him into my opponent’s army earlier than I wanted to because of the suppression he had taken. Finally, and this one is slightly obvious, the droids suffer from a lack of options currently, as they don’t have much variety or any tools beyond Grievous killing everything. 

At the end of the day, it was great to put a fully painted droid army on the table for real, and to meet some new Legion players. I got to make the trip out with one of my local players, and play on some interesting looking tables. I’m still not sure which faction I want to take to Adepticon, but CAPA did nothing to dissuade me from bring my CIS, and the impending arrival of Dooku will do nothing to dampen that. I hope you enjoyed this quick recap for CAPA 2019, and if you have any feedback or questions regarding the droids performance, feel free to reach out!


-Mike

A Quick Guide to Battle Droids and Uplinks

Strategy
He must be checking out the clouds

The Confederacy of Independent Systems (CIS) has officially arrived in Star Wars: Legion, and they bring a new playstyle and arsenal to the table. Coming forward in a mass horde, they overwhelm with numbers, dice, and General Grievous’s stolen lightsabers. With their access to Coordinate: Droid trooper, the mindless B1s are able to stay under control and keep your forces in near perfect control every turn. However, as we’ve learned, when they don’t have an order and AI: Attack triggers, the B1s turn into a giant mess. Therefore, getting orders on them is paramount, and there are two ways to do this: command cards and HQ Uplinks. Let’s quickly examine the second option today.

The commonly accepted consensus at this point is that two uplinks in your corp troopers is the most optimal setup for activation control. Going along these lines, there are two points to discuss for the uplinks: battlefield placement and squad choice. 

Let’s begin with squad choice.  To demonstrate this concept, lets take a look at the CIS list that I like most at the moment: 

800/800

General Grievous (Strict Orders, Aggressive Tactics, Tenacity, DT-57 “Annihilator”)

2× Battle Droids (E-60R Trooper, Battle Droid, HQ Uplink)

4× Battle Droids (E-5C Trooper, Battle Droid)

2× Droidekas (Linked Targeting Array)

One of the biggest concepts to master in legion is action economy, which can simply be defined as getting the most out of every action possible. In this list, I have two rocket launcher B1 troopers, which are an exhaustible heavy weapon choice. Similarly, uplinks are an exhaustible comms upgrade. Considering you don’t want to be taking recover actions frequently, maximizing the amount of upgrades you can refresh on each recover action becomes crucial. Therefore, stacking the uplinks and rocket troopers becomes an easy choice. 

Where to place these troopers is also an important choice. Fortunately, it’s a rather simple one as well. Lets take a battle lines deployment for example. When deploying your B1s, keeping each squad interlocked and within range one of other B1 squads is important, and allows you to daisy chain orders from one squad to another. Therefore, I am of the opinion that sticking each of your uplinks at either end of the chain is the best play. By starting the order chain from one end, you guarantee that every squad down the line will get an order (unless the jammer Tauntauns have already arrived in your lines). This also gives you some flexibility because you are not reliant on recovering every turn with a squad, it allows you to spend a turn move shooting or interacting with an uplink squad while the other one triggers the orders. 

The next option, and slightly more complicated one, is the keep both uplinks on one end of the chain. This involves two slight issues to keep in mind: the chain can be more easily interrupted due to a lack of flexibility of end choice, and you have to keep a beehive-cohesion between the two B1 squads on the end, to ensure that the “inner” uplink squad can still hit the entire chain when it triggers the uplink. While this strategy does work, it is much more complicated and does not offer the flexibility of the “double end” idea. There is one specific occurrence when this may be the better choice: when facing armor. Due to a lack of impact currently possessed by the CIS, the rocket troopers may need to be stacked together to ensure that something like a Flamer AT-RT (a B1’s nightmare) doesn’t get into range.

A visual example of the two Uplink placements

While the CIS faction is brand new, it comes with some killer haymakers courtesy of Grievous, but even he can’t do it alone. Keeping your B1s under control and in order is crucial to success, and I hope this quick hitter gives you some basic ideas on how to do so. For the time being, the CIS only have a few tools in their shed, so make sure that you keep those tools sharp. Speaking of the CIS, I will be taking them to CAPA Cup 2019 in Hershey, PA this weekend, and we will have a battle report of the weekend ready for you early next week! Until next time, good luck with your games, and hopefully your B1 building and clone painting isn’t too excruciating. 

-Mike

Luke vs. Luuke

Rebel Analysis


Forget Operative vs. Commander, it’s Luke vs. Luuke

Greetings! The upcoming release, and recent spoiling, of Operative Luke Skywalker has cast quite a decision upon the community: do you continue to use Commander Luke with some new command cards, or do you pay the extra points to get an even beefier version? Today, I’d like to touch on some comparisons and command card scenarios for each unit, and attempt to lay a case comparing the two. In terms of raw stats and general command card usage, Op Luke seems to be slightly advantaged, but time will tell if the extra 40 point cost (plus an upgrade or two) is a fair price for some new abilities and a better lightsaber. First, let’s briefly cover the new command cards coming within the Operative Luke expansion.

New Command Cards

You Serve Your Master Well (YSYMW) is one of the most interesting, potentially powerful cards the rebels have access to. It functions in the same manner as the Emperor’s Pulling the Strings ability, but adds the caveat of a non-commander or non-operative, as well as the ability to use it on a suppressed enemy unit. Why is this so good? Well, using Jedi Mind Trick with Luke will suppress any valid target for this card, allowing you to use an enemy unit to attack another enemy unit (those Deathtroopers never cared for Krennic anyway), or have one of your powerful friendly units (tauntauns perhaps?) attack twice in a turn. Yes, this move triggers relentless. This action is a free action, and allows Luke to retain both of his own two actions, leaving him free to attack or pull some force push shenanigans of his own as well.

Full of Surprises helps to boost Luke’s survivability. He gains a dodge and the ability to roll extra white defense dice for the difference between his courage and number of suppression. The short version of this is that the “earlier” Luke gets shot at, the better his defensive rolls will be. Seeing as Luke is usually a prime target for the enemy to focus down, he will generally have a few suppression, meaning that the primary ability of this card is giving Luke access to a “better deflect” for the first volley fired his way. Full of Surprises is potentially a strong turn 2 or 3 card, where you have to expose Luke to a dicey position and want to boost his defense in preparation for a 1-pip assault the next turn.

Have you every thought, “I wish Luke had a change of plans card like Han does?”. Well, he has a version now. I am a Jedi removes Luke’s ability to attack for a turn, and in return gives him Surge to Block and allows you to choose two enemy troopers at range 1, and deny them the ability to attack this turn as well. This card is extremely powerful, but comes with a large opportunity cost, as you are giving up 200+ points of offense for an entire turn. Just like change of plans, this card is extremely timing dependent, and some of the best cards to counter with this card include Son of Skywalker, Implacable, Trained in Your Arts, and And Now You Will Die. 

Unit Cards


Luke Skywalker
Commander (160)
Health
: 6
Courage: 3
Attack: 6 Black  with Pierce/Impact 2 (Melee) and 2 Red  with Pierce (Range 1-2)
Keywords: Charge, Deflect, Immune: Pierce, Jump 1
Upgrade Slots: Force, Force, Gear
Surge Crit


Luke Skywalker2

Operative (200)
Health: 7
Courage: 4
Attack: 7 Black with Pierce/Impact 2
Keywords: Charge, Deflect, Disengage, Immune: Pierce, Master of the Force 1, Jump 1
Upgrade Slots: Force, Force, Force, Training
Surge Crit

Right off the bat, Op Luke is 40 points more expensive. What do those 40 points get you? An extra health, courage, force upgrade slot, and attack die, a training slot, Disengage, and Master of the Force 1. These are all substantial upgrades, but you also lose the commander courage bubble, stims slot (gear slot), and the built in ranged attack. Having an extra force slot can only be seen as a net upgrade, but the training vs. gear slot can definitely be debated. Having a gear slot grants Commander Luke access to emergency stims or recon intel, thereby staying alive for an extra round or getting into the action quicker with a free speed 1 scout move at the start of deployment. However, the training slot gives access to tenacity (an extra red for a crazy 8 die pool), endurance (shedding an extra suppression to keep Luke moving), and offensive push (gaining an aim token after a standard move when you need to double move and kill something). The importance of Disengage cannot be overstated as well. Having the ability to move out of a single melee combat at will not only saves force push for protection purposes later on, but also ensures the enemy can almost never tarpit Luke or slow him down to keep him away from his terrified target.

Considering all testing with Op Luke so far has been through proxying or TableTop Simulator, much more data is needed to make a definitive answer to which is better point for point. I believe this will come down to play style, as Commander Luke functions better as a linebacker unit that holds down the troops while waiting until the late game to pounce; due to his courage bubble and one less health and courage. Meanwhile, Op Luke functions as the ultimate melee alpha strike, as his higher courage value and greater health and damage output mean he can get into the enemy lines before they can stop him. (Picture that with triple tauntauns or even wookies) Once he gets there, he can also hop from engagement to engagement through his use of force push and disengage. 

Both Luke models have the ability to use either’s set of command cards, so with six options per mini I think its worth quickly going through the cards and noting some stylistic differences between commander and operative. Spoiler alert: there aren’t too many, but Op Luke appears to have a slight edge here.

One Pips: Son of Skywalker & You Serve Your Master Well

Honestly, there’s not a whole lot of difference here. Son of Skywalker functions the same for either model, two giant melee attacks with pierce tend to kill their target. One caveat for Op Luke, you may want to invest in a 5 point Saber Throw, as a 4 black pierce 2 range attack is a fairly decent second strike if you kill your first target. Its also not terrible on its own. YSYMW edges slightly in favor of Op Luke here, as Jedi Mind Trick is capable of suppressing any enemy unit, and Master of the Force ensures that Op Luke has the option of having it every single turn, whereas a mistimed Jedi Mind Trick by Commander Luke can leave you high and dry. 

Two Pips: My Ally is the Force & Full of Surprises

My Ally functions identically for both Luke’s, as both have deflect and the same raw defensive stats. Full of Surprises once again edges slightly towards Op Luke, as he has an extra courage value to boost those additional white dice. Pretty straightforward here.

Three Pips: Return of the Jedi & I am a Jedi

It seems like FFG might be telling us Luke is a Jedi, doesn’t it? Just like My Ally, Return of the Jedi functions the same for both versions, and arguably I am a Jedi does as well. However, you can make the argument once again that Op Luke has a slight advantage in his usage of I am a Jedi because of his extra point of health. This is a very edge case, but having an extra health can allow Luke to survive the current turn and make it to the command phase of the following turn to play the card before he dies. This same argument can also apply to Commander Luke with Stims, but considering Stims is an optional upgrade, I give the slight, slight, slight edge to Op Luke. 

So, you’ve heard the cases, seen the evidence, and had some time to digest the information, which version of Luke is more worth your points? It’s still very hard to say, and I’ll offer a cop-out. If you already run Luke in a Wonder Twins-style list, I give the edge to Op Luke, as he hits harder, has better survivability, and slightly better action economy through his Master of the Force ability. Additionally, Op Luke comes with a “commander tax,” where you are forced to run a commander to accommodate the force organization chart, and having Leia as an integral part of your list removes that tax. In a Luke-Sabine style list that Zach and I are fond of, Commander Luke takes the day, as he presents a better courage bubble than the Generic Officer for Sabine and the troops, and costs 40 points less so you don’t have to skimp on any upgrades that are direly needed, such as Sabine’s Darksaber or squad officer upgrades. I’m personally interested in which version will better suit a tauntaun list, as fitting 2/3 tauntauns plus Leia and either version of Luke is a sizable investment. Personally? I’m taking Op Luke and a fleet of lizards into Invader League 4, so I’m betting Operative. 

Next week, Zach will take a look at Operative and Commander Vader, so be sure to stick around for that, as the Dark Lord of the Sith is primed for a resurgence on the tables following his points drop and new command cards. As always, if you have any questions or comments be sure to fire away, and join in on the Facebook group and Legion Discord for some discussion on which Luke will be swinging his way into your upcoming lists.

-Mike

Creature Trooper Oddities

General, Strategy

This may come as a surprise based on the amount of discussion that has already occurred, but Tauntaun Riders have only been out in the wild for a month, and the Dewbacks delayed release has meant that only a small number of people own them. Despite this, a number of interesting and unique movement and engagement scenarios and rules questions have arisen. Today, I would like to very briefly discuss some of the common situations that I have run into, and provide a concise, clear resolution for them.

This is meant to be a very quick overview (perhaps to get you ready for Invader League Season 4?) in which I will list and go over some of the relevant rules from the Rules Reference Guide, before diving into some Tabletop Simulator created examples, graciously provided to us by Sploosh (you can find him on the Legion Discord). Please feel free to reach out to Zach or myself specifically if you have any questions, and be sure to join the Discord or Facebook and ask the community. As a fair warning, today’s article is fairly straightforward, to the point, and slightly dry in nature, but will clarify a number of commonly asked questions.

Lets first take a look at some important creature trooper rules. These can be found in the rules reference guide under the headings Creature Troopers, Displacement, Creature Trooper Movement, Reposition, and Standard Move, on pages 29, 35, 50,  59, and 65.

  • Creature Troopers, pg 29 
    • Creature troopers cannot be displaced. 
    • Trooper and Ground Vehicle minis cannot move through creature troopers
  • Displacement, pg 35
    • If a unit leader was displaced, it must be placed within range 1 of its original position.
  • Creature Trooper Movement, pg 50
    • A creature trooper mini cannot move through or displace a trooper mini that is engaged. 
    • A creature trooper mini cannot move through or displace emplacement trooper minis. 
    • A creature trooper mini cannot move through or displace other creature trooper minis. 
    • While engaged, creature trooper units do not have to withdraw to perform moves and can displace non- creature, non-emplacement trooper units with which they are engaged while doing so.
  • Reposition, pg 59
    • When a unit with the reposition keyword is being moved by an opponent, such as via the Force Push upgrade card, the reposition keyword can be used by the opponent during that move. 
    • Standard Move, pg 65
    • All speed-x moves are standard moves. 
    • Pivot, Reverse, Climb, Clamber, Embark, and Disembark are not standard moves. 

That’s quite a bit of text isn’t it? The main things to take note of, and the examples we will explore shortly, are that creature troopers cannot move through other creature troopers, emplacement troopers, and ground vehicles. Additionally, force push cannot be used to reverse a creature trooper, but you can trigger reposition with them.

Let’s take a quick look at some examples.

You are Luke Skywalker in this example. Luke is engaged with the tauntaun currently, and is attempting to escape the melee. There are three ways for Luke to escape: withdraw, force push, or kill the tauntaun. Withdraw and elimination are pretty straightforward, so let’s focus on the force push. Force Push reads that you “perform a speed-1 move with that unit, even if it is engaged.” This wording is important because all speed-1 moves are standard moves, and reverse is defined as not being a standard move (pg. 65). Therefore, Luke cannot force push the tauntaun backwards. This means that the only other force push option is to actually displace Luke himself, because the tauntaun’s base will cross over Luke’s base, even if reposition is triggered from force push. Per the displacement rules (pg. 35), because you are performing the movement with the tauntaun model, your opponent places Luke within range 1 of his current position, potentially putting him in a dangerous location.

In this example, the red tauntaun has moved into position to block the blue tauntaun’s forward movement. Creature troopers cannot move through other creature troopers (pg. 50), and therefore the blue model only has one option: reverse. If you look closely at the models, even if the blue model pivots the full 90 degrees to its right, a small portion of the base would still move through the red base, making the movement illegal. This can be seen in the following graphic.

This example can be the most difficult one to resolve because the smallest sliver counts as a movement through another model, and sometimes this situation can be unclear and result in a judge needing to be called.

In this example, both models have their forward notches locked inside of their opponent’s notch, resulting in a stalemate. Despite the complex looking nature of this engagement, it is actually one of the simplest examples. Neither model can pivot in any direction without crossing through the other’s base, and this leaves only one option again: reverse.

In contrast to the linked bases in the example above, this melee does not have as many restrictions. Both units are able to clearly reverse, and also have the ability to pivot to escape. However, in order to ensure that no base overlap occurs, the full 90 degree pivot must be taken, and a straight movement must follow. Anything less than the full 90 degree pivot would result in the movement template being dragged across the opponent’s mini’s base.

As a bonus, let’s take a quick look at a hot button detachment ruling: when deploying the detachment unit, can you place the emplacement anywhere within range 1, including on top of a building? The short answer? Yes.

As goofy as this may seem, we currently do not have any language or text preventing a MK2 or Mortar from being deployed on top of a height 3 building, as long as it is within a speed one movement distance from its assigned corp unit. While it’s possible that this is clarified at a later date, there is already a tournament precedence from NOVA to allow this occurrence.

One final note: Do you like big archways over looking the water? Do you want to visit the current city that (unforunately) holds the Stanley Cup ? Have you watched War Corgi on Youtube and want to meet a Legion celebrity along with Legion’s top judge Brendon Franz? Well, I have the place for you! Join Brendon and crew at Warfaire Weekend this November 8th and 9th for the second of three Grand Championships this Legion tournament season! Earn cool swag, win a seat to come join Zach and I at next year’s High Command (aka Worlds), and receive free airfare if you win the whole thing! Sign ups are here.

-Mike

Through the Lightning and the Fur

Battle Reports
Image result for luke force lightning
 

Hello there! I recently had the opportunity to travel down to the NOVA Open for the latest Star Wars: Legion Grand Championship. Seeing as Legion is my first mini’s game, NOVA was my first wargaming convention, and it was pretty cool to wander around all the other tournament setups, especially the Middle Earth tables. (Seriously, someone help me buy into that game…) I played in the second heat, which took place on Friday, and the event TO’s had all the tables set up and ready to go for us. My day began with Palpatine, ended with Palpatine, and included nothing but Tauntauns in the middle. Let’s jump into the list real quick, and then dive into the swiss rounds.

“Anything but Kriss Kross”


Commanders:

– Rebel Officer (50) + Improvised Orders (10) = 60

– Luke Skywalker (160) + Force Push (10) + Jedi Mind Trick (5) + Emergency Stims (8) = 183

Operatives:

– Sabine Wren (125) + Tenacity (4) + Recon Intel (2) + Electro Grappling Line (5) + The Darksaber (25) = 161

Corps:

– 2x Rebel Troopers (40) + Z-6 Trooper (22) + Rebel Officer (19) = 162

– Rebel Troopers (40) + Z-6 Trooper (22) + 2-1B Medical Droid (18) = 80

– Rebel Troopers (40) + Z-6 Trooper (22) = 62

Special Forces:

– 2x Rebel Commandos Strike Team (16) + DH-447 Sniper (28) = 88


Total: 796/800 

Commands:

– Explosions! (1)

– Son of Skywalker (1)

– My Ally is the Force (2)

– Push (2)

– Legacy of Mandalore (3)

– Return of the Jedi (3)

– Standing Orders (4)

Unsurprisingly, Zach and I run a very similar list. About a month before NOVA, the Legion world was upended and the Tauntaun Riders expansion released. Personally, I didn’t want to run them, and I actually decided to drop down to 9 activations as a Rebel. Blasphemy, right? The basic concept of the list is to maximize Luke and Sabine as twin beat-sticks that the opponent cannot stop, and to have the generic officer keep the army troops in order. Having this second courage bubble allows Luke and Sabine to travel independently of the main forces, letting them be more flexible in order to expose weak points and counter Tauntauns. As I’ll discuss in a future article, I had three officers throughout the list, giving me three points of inspire to spread among the squads. Also, seven of my nine activations are at least courage two, meaning that I’m taking both actions with every unit nearly every turn. I ended up taking a 4 point bid, anticipating a number of 800 point Deathtrooper lists….and ended up only being blue player once. I never faced a Deathtrooper. Not once.

Round 1


My first round opponent played perhaps the most interesting list I’ve ever been on the other side of: Palp Double Bounty. Rounding out the list were three DLT Stormtoopers and a Royal Guard with electrostaff. All in all, heavy on firepower but super light on activations and order control. We ended up playing Recover/Major Offensive/Clear Conditions. Fortunately for myself, the middle box ended up on top of the height-two complex in the middle, meaning that only our Sabine and Boba could get there in one move. Also in my favor, my Sabine had recon intel and I had two extra activations, meaning I was able to get to the box and claim it at the end of round one. Finally, I was able to add a few wounds to his Bossk on turn one, who needed to expose himself to take any kind of shot at my troops behind the rocks and the complex.

Standing on top the complex, Sabine seemed primed for an Explosions! drop on turn two. News flash: drop it I did. I was only able to get four wounds out onto the table, but I was able to dish out eight suppression tokens, giving Sabine a chance to get out of line of sight, and also slow down the opponents army, as Palp does not have any suppression management keywords. Using my officer Z6 squads, I was also able to take two shots at Bossk in only light cover, force him onto stims turn two, and after failing his regenerate rolls, he left the battle quite early.

The final major action occurred on turn four. Palpatine activated his And Now You Will Die turn, moved up, and eliminated three of my activations, but left himself exposed and weakened to be gunned down by Sabine, who herself still sat on top of the complex. This left my opponent with zero boxes at the end of the game, and I was able to take it 3-0.

Round 2

I’d have preferred Wampas

My second matchup was the start of my furry torment: Leia, 6 naked assorted corp trooper units, 3 Tauntauns, and a fully kitted landspeeder. It was an intimidating sight: eleven activations of rebel killing fury lined against my crack team of nine activation rebels. The first two mission cards were breakthrough and vaporators, so I ended up having to force intercept in the final slot, not a task I was thrilled about, being down two activations from the start. The final cards flipped over as Intercept/Major Offensive/Clear Conditions

The game started off exactly as you would imagine, with the three Tauntauns being deployed on the panhandle short edge and moving forward twice at the end of the first turn. As I’ll get into more over the next rounds, this triggered my strategy that I believe helped me get through my Tauntaun gauntlet. Just like the majority of one pip command cards, the No Time for Sorrows Tauntaun rush can be telegraphed as well. Fortunately for me, that card is a two pip priority, and Son of Skywalker is a one pip. By positioning Luke in a way that he can start turn two in charge range of a Tauntaun, I can jump priority of the charge, and potentially eliminate a tauntaun before it gets to my lines and my units. As one burger is fond of saying, two Tauntauns are useless, but three are broken. So make sure you kill the first one as soon as possible. 

The bulk of the action occurred on rounds two and three. Using SoS, I was able to kill a Tauntaun, force push a fleet trooper squad into cohesion around Luke, and use that cohesion to pin another Tauntaun to the board edge, since creature troopers cannot move through engaged units. Once the first was killed, and the second was locked up, I spent the rest of my units’ activations positioning Sabine for the next two rounds, and using the Z6s to eliminate the final Tauntaun. By the start of turn 4, all of the Tauntauns were eliminated, and Sabine was primed to drop Explosions! onto the exposed corp troopers on the middle point. By the time the final activation of round 6 had occurred, Sabine captured the middle point, and I won the game tied 6-6 on points destroyed. 

Round 3

And here it came, the final round for the chance to move onto day two. Lining up across from me, another triple Tauntaun list, this time rounded out with Leia, 4 Z6s, and 3 snipers. Yet another eleven activation list to my nine. Similar to the last game, we drew Intercept/Battle Lines/Clear Conditions. As you can see from the photo above, this map was not the best design setup for Tauntauns, and I was able to force the engagements to the right hand side. All three Tauntauns were primed to charge the right hand side, while his corp troopers moved towards the center transmission. Because of the buildings large cover profile, I set up Sabine to drop Explosions! on potentially his entire corp turn two. Once again turn one, my opponent double moved his Tauntauns to set up for NTFS, and I was able to position Luke in a charge position to jump priority turn two. Interestingly enough, one Tauntaun was about eight inches ahead of the other two, and I had an interesting decision to make: SoS or Explosions!

In the end, I chose Explosions!, hoping to distract my opponent and allow me to take some shots on the Tauntauns before they could activate. My opponent pulled his NTFS card, and I decided to try to go to the order pool instead of activating Sabine right away. I ended up pulling a commander token, and I chose to go with Luke. For the second straight match, I was able to use Luke to jump priority and severely limit the Tauntaun charge before it began. Jumping out of the little house on the right side, I was able to melee a Tauntaun, eliminate one of the models, then use force push and jedi mind trick on another Tauntaun to make it move away from my units and suppress it. This game very much turned into two smaller skirmishes, with Sabine taking on my opponent’s corp alone for the first four turns, and Luke and the rest of my forces taking shots at the three advancing Tauntauns. I was able to drop Sabine’s bombs on six total activations, slowing him down enough that by the time Luke dropped SoS on turn three and eliminated the final Tauntaun, I had plenty of time to converge my two lightsabers on the middle. 

On turn four, I spent my entire turn moving into positions to assault the middle transmission for the endgame. Every unit double moved except for Sabine, who hopped into melee with a Z6 squad and Darksabered them. By the start of turn five, both my opponent and I realized that this game was going to come down to whether or not Luke and Sabine could kill enough rebel trooper squads to win the middle objective. Predictably enough, lightsabers with pierce shred rebel troopers, and I was able to win the final attrition battle to score both objectives, and win on points destroyed for the second consecutive game. 

Round 4

Well, I made it this far right? Only one more win, and Zach can’t belittle me for not having an invite. Interestingly enough, based on the odd number of players in the second heat, and some strength of schedule shenanigans, my opponent from round two ended up making it through to the top cut, and we rematched for all the marbles. We ended up with Advanced Positions/Key Positions/Clear Conditions

This game started off with a bang, after my opponent drew his landspeeder first, it moved forward, and left itself exposed. I spent the entire first turn shooting at the landspeeder, leaving it only one wound. I also managed to position my Luke to threaten the advancing Tauntauns. Unfortunately, I was unable to get the final wound through, and the landspeeder survived to turn two. Turn two comes around, and he drops ambush to counter my Explosions!. He wins the roll, and immediately puts four wounds on Sabine through cover. I end up dropping explosions on only two units, and Sabine was quickly eliminated on the next activation. I must admit, trading Sabine for only a landspeeder felt pretty bad, and being down ten activations to eight with three Tauntauns coming at me felt terrifying. Fortunately, I was able to move Luke into a Tauntaun this turn, and use force push to yet again tie up the fleet troopers nearby, ensuring that Luke was safe from enemy fire, and the Tauntaun could not advance forwards through the engagement. Turns three and four consisted of my Luke chopping the remaining Tauntaun model he was engaged with, before dropping SoS onto the other cavalry nearby, eliminating both activations decisively.

The final rounds were pretty standard Legion fare, with the two of us trading shots back and forth as we advanced towards the middle position. Luke was able to do Luke things; recovering, pushing, and mind-tricking his way to the middle position and eventually allowing me to score the key position as well as my back objective, securing me the win, and the world’s invite. I had survived the Tauntaun gauntlet, and come out the other side by the skin of my teeth.

Round 5

In what ended up as my final round of the day, I had the pleasure of squaring off with Kyle Dornbos, aka Orkimedes, and boy did I learn a lesson. We ended up playing Sabotage/Battle Lines/Clear Conditions. After getting all jacked up from winning the invite and dealing with triple Tauntaun lists for the past three matches, I ran into a gunline style list, and I completely forgot how to deal with it. During deployment, I made a major mistake, leaving two of my Z6 squads behind only light cover, which I had forgotten was not heavy… safe to say, Kyle dropped “An Entire Legion” turn one and ended up with four sniper shots into my open squads. They disappeared quickly. 

Mental mistakes abound, downed trees are not heavy cover

Over the course of the next three rounds, I traded an officer Z6 squad for a snowtrooper squad (not great) and attempted to assault his positions by coming over the top of the rock formation on the right hand side. A combination of Palpatine, IRG, and DLT fire kept me from achieving that goal. I ended up conceding with barely a model left at the end of turn five. Props to Kyle for going on and winning the whole tournament, he’s a hell of a player who doesn’t make mistakes and showed me the next level I need to reach. 

Recap

All in all, it was a successful tournament and a fantastic first wargaming convention experience. I managed to take a nine activation Rebel list into the heart of Tauntaun country and emerge with a High Command invite, and had a chance to catch up with some of our community members in person again. I’d like to make two quick points about the terrain set up. When I played on Friday, the tables were not the best, but they forced players to think outside the box, and with the exception of tanks (sorry Stevens) no unit was totally unplayable. I’d also like to thank the TOs for thinking on their feet and working extremely diligently to present the best tables they could despite their hands being tied; additionally, the tables on Saturday were absolutely fantastic. While it was fair to talk about how bad the tables were during the first round, I know that John Brader’s (the main TO of Nova Legion) Facebook explanation post went uncharacteristically ignored in some outlets, which isn’t fair to either of the TOs. If you want to disparage those first few tables you can’t ignore the fixes after. Thanks again to John and James for being super aware of the situation at hand; to all my opponents, you were great fun to compete with, congrats to Kyle, and I hope to see everyone again at Adepticon. With the new points changes and the drop of the two new factions, I’m glad to get this out of the way; welcome to the New World Order everyone.

Damn, it feels good to not be the only Jedha member without a ticket.

-Mike

Your Focus Determines Your Reality

Strategy
“I want every gun we have to fire on that man!”

Welcome back to the Jedha Journal! We have something a little different this week for you, a guest writer! As Zach spends some time with important real life decisions, Asyer, my teammate from the Yavin Base Team League, will be joining us for a dive into the ideas and tactics of focus firing. Namely, we want to discuss the concepts of shooting to kill vs. shooting to suppress. Asyer has graciously offered to discuss the concept as a whole as well as explore the Empire’s unique exceptions to the rules. Without further ado, let’s dive in with his debut.

Surviving the Heat

Most of us tend to get caught up in the heat of battle. We lose sight of the objectives and just want to kill as much as possible. It feels really good to watch your opponent remove minis from the board, but this can lead to more game losses that you realize. I want to discuss my thoughts on remembering to focus. There are two parts of this I want to go over: focusing fire and focusing the objective. 

Focus firing isn’t just about removing models from the table. Outside of command cards and special abilities, every unit has a maximum of twelve actions it can perform. Twelve, that’s it! So, when you remove an enemy unit from the table, they also lose that unit’s remaining actions. For example, killing a unit before they activate twice takes away ten actions. By removing activations, your opponent is forced to activate key units earlier in the round, giving you more units and more chances to respond to what they are doing.

Lets take a look at Luke Skywalker for example. Luke likes to jump from cover to cover until he can get into melee with a unit and kill it. Luke likes to activate last so that you have less units that can hurt him if he gets stuck in the open. If you remove activations on Luke’s side, you put him in the uncomfortable situation of having to activate before a larger number of your own troops, and the chances Luke gets caught out in the open skyrocket. (Luke tends to die to heavy amounts of fire.)

You can also remove enemy unit actions with suppression and panic. Suppression is a great tool to use and often can win you the game. Lets take Breakthrough as an example. Unit A needs to double move to make it into the enemy deployment zone. You shoot unit A and add a suppression token to them. If unit A doesn’t clear that suppression, they can no longer score. I find it is best to add two suppression to a unit to ensure it stays suppressed. The chances to clear two are significantly lower than only having to clear one. Thanks to some wonderful suppression tables supplied our friend Orkimedes over at The Fifth Trooper, we know that you have a 34% chance to remove one suppression token, but just an 11% chance to remove both. Seems a little tougher doesn’t it?

Panic is amazing, as long as you are the one causing it. If you force a unit to panic, three things happen. First, that unit moves as fast as possible towards the nearest board edge. Second, they lose their second action that turn. Third, that unit isn’t where their player wants them (usually in the open and away from where they need to be.) Units that panic and run even a sliver off the board are instantly dead!

Focusing on the objectives is the most important thing in the game. It’s how you win! This doesn’t just mean making sure you accomplish the mission, but also keeping your opponent from scoring. Ask yourself two questions when you activate a unit: “Does this help me score victory tokens?” and “does this help me prevent my opponent from scoring victory tokens?” If you’re ahead in both victory tokens and activations then it is even more important to stop your opponent from scoring. If they can’t score, you win! However, if you can’t stop them from scoring, you need to be scoring also.

Focus fire units to remove them from the board, or stop them from getting all their actions, and your path to victory becomes much more straightforward. This topic seems pretty basic right? As usual, nuance springs eternal, and we’ll swim a little deeper into a sampling of each faction’s quirks regarding suppression, panic, and their action management, as well as whether or not focusing on eliminating or suppressing units is the better option when dealing with each faction.

-Asyer

An Inspiring Start

Both in canon and in Legion, the Rebellion’s identity comes from its leaders, its heroes, and its sense of purpose. This concept is codified into the Inspire keyword. The Rebels have a large access portal to Inspire, whether that comes from Leia herself, the Rebel Officer unit or upgrades, or a number of command cards from Luke, Jyn, and Sabine. Because the Rebel units, and especially heroes, tend to be less expensive than Imperial or GAR units, fitting in a number of these officers and heroes is extremely common, and very practical. So what does all of this mean? Shoot, shoot the rebels.

Lets take a Flyboys (Luke & Han) list for example. If you are lined up across from this, you can reasonably expect to see Luke and two Officer Z6 squads. This means that in addition to standard rally rolls, there are two individual points of inspire available per turn, and Luke’s 3-pip suppression clearing card, Return of the Jedi. Therefore, the list has a decent chance of ensuring that its units maintain their two actions throughout the turns. Additionally, with the notable exception of Luke, every unit in the list rolls white defense dice. Therefore, if your opponent can manage suppression well but fails defensive saves often, shoot to kill them. 

One final caveat to remember is that many of the rebel command cards that grant Inspire and remove suppression are two and three pip cards. This means that many of them are not played turn one, offer decent-to-good order control, and often impact the late game board state. Therefore, as an exception to the above Flyboys example, putting suppression down on the rebel army in the early rounds tends to prove more productive than going for the late game suppressive fire, as you force your opponent to play their command cards out of order, and remove their abilities to keep their unit actions running efficiently later on.

darth vader krennic rogue one a star wars story

Compelling Aspirations 

As always, every rule has an exception. Normally when a unit is suppressed, it loses an action. Today, we’ll look at the Empire’s unique exception to the rule: the keyword Compel. Both Director Orsen Krennic and DT-F16 have this keyword, which reads, “After a trooper unit at range 1–2 of a friendly unit with the compel keyword performs its ‘Rally’ step, if that trooper unit is suppressed but is not panicked, it may gain 1 suppression token to perform a free move action.” A crucial element to remember is that Compel always returns a lost action, but never adds an extra one.

So, by adding a suppression token to your unit, you can take a move action as your first action. Abilities and keywords that trigger off of a move action still take effect, such as relentless and steady. You can then take a 2nd action as normal.

So now you’re thinking, “why not do that every time?” Well, adding too much suppression can lead to panic. And panic isn’t what you want. Making the choice to Compel or not is purely situational. As a general rule of thumb, I compel if it will get me into a better firing position, or to score the objective. Pushing your units that extra step to take the actions you need to win the game is where compel excels. Finding that balance of when to push without breaking them is where the difficulty lies.

Our second suppression rule breaker is our Dark Lord and Savior, the Balancer of the Force, Darth Vader, specifically the commander version. Vader has a currently unique courage of ” – “ which means he does not take or suffer from suppression. When using his courage bubble for panic tests, this means your units will never panic if they remain in range 3 of Vader. Besides, “Who is more frightening than the Lord of the Sith?” When you combine compel with Darth Vader, you get a nice bubble of “we don’t care about suppression.” This allows you to compel your units way past their normal breaking point. Be careful though, should Lord Vader fall in battle, your units will likely all panic if loaded up on suppression.

-Asyer

Fire Away

If you recall from last week, Zach wrote an excellent piece on using the clone’s Fire Support ability to prevent panic and suppression issues. To avoid repeating ourselves, I will be focusing on the clone’s decision-making process regarding focusing on killing or on suppression.

Here’s a hint, it’s in easy choice. 

At least from the outset, most GAR lists are looking at roughly eight activations. This means that there is little-to-no margin for error, and each unit’s actions must be optimized. Therefore, when taking attack actions with your units, you need to be sure that you are evening the numbers or pushing yourself into the green. With the fire support ability, wiping units becomes easier than suppressing them. It must be stated that using fire support to suppress a target is a complete waste, as you are actually dishing out half of the suppression that you would with two separate attacks. However, being able to double your attack pool means that you have a much greater chance at eliminating an enemy unit, especially one that is wounded or one with white dice saves. Finally, keep in mind that using fire support actually reduces the amount of actions that you have during the game. As Asyer mentioned above, each unit typically only has twelve actions to take during the game, and fire supporting too often can almost act as a self suppression pitfall, not allowing your units to move into scoring positions effectively later in the match.

Mechanized Minions

Last but not least, we arrive at the droid army. According to the droid trooper entry in the Rules Reference, droid trooper units do not suffer the effects or benefits of suppression tokens, but still receive them as normal. Crucially however, they can still panic when their threshold is reached. This makes it slightly easier for the CIS to keep their twelve actions, but can prove devastating if the commander is lost. Especially considering the droids do not currently have another unit besides Grievous that has a courage higher than one.

When facing off against the CIS, these unique suppression rules make the decision to focus on removing models vs. suppressing them quite simple. Assuming the CIS have a living commander, shoot to kill. Spending upwards of three attack actions to panic one B1 squad is a colossal waste of resources, and the odds of forcing a droid to panic before it dies are quite minimal. However, if you manage to kill Grievous and remove the courage bubble from the battlefield, looking to panic droid troopers is not the worst idea depending on the circumstance. This holds especially true for the Empire and their litany of suppressive weapons, as a single attack can panic the troops. 

At the end of the day, choosing whether to shoot to kill or shoot to suppress seems like a difficult choice, but generally boils down to a straightforward decision: which choice will remove more actions from the opponents unit. As a reminder, if you’d like a high profile chance to test these concepts out, the London Grand Championship runs from September 12th-14thand still has spots available. Come win a World’s invite, and anyone who beats Zach in Chicago will win a beer from me! I hope you enjoyed the insights Asyer provided for us, and look forward to discussing your ideas in the comments. Until next time, enjoy your games of Legion!

-Mike

Faction Identity: Grand Army of the Republic and Confederacy of Independent Systems

General

Imperialmarch

“Only begun, this Clone War has.”- Master Yoda

It’s time to follow up on last week’s post about the faction identities of the Rebels and Imperials with the two new factions coming to Star Wars Legion: The Grand Army of the Republic and the Confederacy of Independent Systems. Of course, like the simpletons we are, we are going to reference them as Clones (GAR) and Droids (CIS), respectively.

What an absolutely exciting time to be a Star Wars Legion player. I think a lot of us can say that the prequels, when they first came out, really were a let down for the most part. Sure, Revenge of the Sith was actually really good and may have saved the trilogy; but overall it wasn’t what we all expected. However, the Clone Wars television show may have saved the era. After watching the Clone Wars, I have a new found respect for the prequels and enjoy them a heck of a lot more than I did say 5-10 years ago. Why is this all relevant you ask? Fantasy Flight decided to go with the cartoon version of General Kenobi, with his clone armor look, which makes me think they will use the show for reference going forward. (Please, give us Cad Bane!) People around our age (28 & 25) may find themselves a lot more excited for Clones versus the older, original trilogy crew (Caveat: Original trilogy is my favorite and always will be) and that’s okay! No matter what age you are or whether you decide to pick up the Clone Wars box as an existing player there’s one thing that’s for certain: we should see an influx of new players once these core sets release. It’s absolutely, positively the biggest thing for Legion to date. Between the assumed influx of players, the new plastic sprues, and the addition of two brand new factions; this is a big moment for Legion as a whole. How we react to the new players and factions is the key to this game’s success and it should be with open arms. All that aside, let’s talk about the faction identities before I ramble on even more!

The Grand Army of the Republic

First and foremost: I want to make sure that this doesn’t scare new players from playing the Clones. The Clones are going to be a difficult faction to master out of the gate. I don’t play Warhammer, but for reference everyone seems to compare them to the Space Wolves faction. What I can tell you is that Clones will be a highly elite faction that pays the premium for their elite status. Let’s go over the Pros and Cons to give you a better idea as to why they may be a difficult army that needs a lot of finesse.

Pros

  • Elite Units
  • Weapon Options
  • Red Saves
  • Fire Support
  • Token Passing

If you are an existing player, and perhaps more so a Rebels player, have you ever said to yourself, “I wish I had a Z6 unit but with red saves!”? Well, have I got news for you. Now for the new players reading this asking “What the heck does this mean?”, lets talk about it in more depth.

The reason Clones are considered elite units is because the have the benefit of the stronger Rebel trooper attack dice while also rolling the stronger Stormtrooper defense dice. For reference: Stormtroopers roll white on offense versus Rebel troopers’ black and Stormtroopers roll red saves on defense versus Rebel Troopers throwing white defense dice. Black attack dice and red defense dice give the Clones the benefit of having fairly reliable dice (50% each) on both sides of the game, thus making them the elite army faction. Of course, it comes with the price of being the most expensive army option in the game, which we’ll get to in the Cons section.

Another aspect of the Clones being the elite faction comes with the heavy weapon options. Rebels have the Z6 as the most common heavy weapon and the Imperials have the DLT-19 as their most common heavy weapon. Clones? They have the option of both the Z6 and the new (old?) DC-15 as their heavy weapon. The Z6 rolls six white dice on offense while the DC-15 rolls two reds with Critical 1 and can shoot at range four. This is another great advantage for the Clones, however both weapons do slightly cost more for the brothers from Kamino versus the Galactic Civil War era faction counterparts. It pays to be the best.

A new mechanic in Legion is Fire Support. Right now, as this article is written, the Rebel Veterans and Imperial Shoretroopers are debuting this new mechanic, which presents a small taste of what is to come. Fire Support, as written on the card, is: When another friendly unit performs a ranged attack, if you have a face up order token, each mini in your unit may add an eligible weapon to the attack pool. If you do, flip over your order token facedown. Limit 1 Fire Support per attack pool. What this does, essentially, is give you a crazy dice pool at the cost of an activation.

Presentation1

An example I can give you is that Clone unit A moves and shoots at Target X. Clone unit B, with a face up order token, has range and is in line of sight on Target X and they decide to fire support. Let’s say in this example Clones A have a DC-15 and Clones B have a Z6, you went from rolling four black dice/two red dice to a dice pool of eight black dice/six white dice/two red with Critical 1. As previously noted, this does take away an activation from your Clone army, but if you can take an enemy activation off the board it’s extremely strong.

Another new mechanic for the Clone Wars release is the sharing of tokens between the units marked as Clone Troopers. Clones are essentially brothers and they work together as if they are one, right? Well FFG has encapsulated this pretty well with this mechanic and continues to do their best with making Legion thematically awesome. Straight out of the Star Wars Legion Rules Reference Guide:

» A clone trooper unit may spend the green tokens of a
friendly clone trooper unit at range 1 and in line of sight
as if they were their own.

» Green tokens include aim, dodge, standby, and
surge tokens.

Surge tokens are a new token type entering Legion and how they work is that you may spend these surge tokens on your dice. For example, say you roll three defense dice and you get two blocks and a surge. If you have a surge token, you may spend that surge to turn that die into a block. The fun part, obviously, is the fact that the Clones get to share those tokens. This is going to be absolute INTEGRAL to the faction and it’s identity. This is part of the reason I think Clones will be difficult to master, as this will take a lot of finesse to figure out, but golly it is good. We’ll touch on the tactics of this mechanic later on in some detail! To the Cons!

Cons

  • Army Cost
  • Activation Count
  • Fire Support
  • Ways to deal with Suppression

As you can see, some of these cons echo and may seem redundant. However, it’s important to touch upon all these aspects even if it is repetitive. As you learn to build lists with Clones you notice something: you hit 800 points real, real quick. Learning ways to maximize your points is going to be crucial in order to successfully run the Grand Army of the Republic. Choose your points and upgrades wisely.

Due to the high cost of the Clones, you’ll notice that your activation count will be lower than  Rebels and Imperials. Right now, the Civil War factions hover around ten activations, whereas the Clones will probably come in at around eight or nine. This is why they have Fire Support, though, as it will help them even the activation counts as quickly as possible. Learning how to play while down activations is something that needs to be highly considered when choosing to play GAR.

Speaking of being down activations and Fire Support….why is Fire Support both a Pro and a Con? Well, because you will most likely have fewer activations from the outset of the game, using Fire Support in the wrong situations can lower your count even further. Picking and choosing your spots to use fire support is going to make or break games. You can’t use it too often, you’ll allow your opponent to run amok even if you start deleting units off the board. This plays into the finesse aspect that we’ll touch upon in the tactics next.

A major concern out of the gates for GAR is going to be suppression mitigation. When the core set comes out the only two ways to remove suppression are going to be from Hope, a new Force card that gives Inspire 1, and Strict Orders. Strict Orders allows you to remove a suppression from a unit with a face up order token rather than roll rally dice. Another good thing is that fire support could help GAR avoid panic and manage their suppression. What I mean is that if a unit has a faceup order token and they start piling up suppression tokens….fire support with that unit. Because fire support takes place outside of a unit’s activation, it will ensure that unit doesn’t panic because they will completely skip the rally phase of the round.

Strategy

Presentation1

An example of a lone Clone Trooper mini, safely tucked behind a barricade, passing its standby for a full unit to use

It’s pretty hard writing about a faction I have yet to play, but I intend to give you the best advice I can give you here. There are some easy strategy options on the surface. You’re going to want to play Obi Wan somewhat defensively rather than aggressive, which is completely opposite any other lightsaber wielder currently in the game. Obi Wan has a plethora of ways to get green tokens on the Clones around him, and that’s super relevant and leads to our next point. You want to keep Clones close together. You want to be in line of sight and in range 1 of other Clone units as much as you can due to the token passing. As I spoke about in the Rebels article piece last week, Rebels rely on gimmicks. Well, so does the Clone army. The ability to pass those tokens is going to be crucial. Something you could see happen quite a bit could be some Standby token shenanigans. A unit in the back moves and standbys while being in range 1 of a unit in front of them, then that unit has an enemy unit move near them that would trigger a stand by had they had the token on them. News flash to your opponent, they actually have that stand by token thanks to the Clones having this ability to pass. That might be a super corner case or a niche instance that’s in my head, but it might also have some gumption behind it. Taking a shot on your front lines but have a dodge on your back lines? Here you go, brother! It’s funny to think Clones can pass dodge tokens when they have the DNA of Jango Fett, ya know the guy who definitely did not dodge Mace Windu’s purple lightsaber.

Image result for mace windu looking at jango

Again,I think the trickiest thing will be how and when to use fire support. It’s going to be an extreme learning curve for all players on how to play this faction and you should not get discouraged if it takes several games for you to feel comfortable running them. Theed wasn’t built in a day! No matter what you do: have fun with the shiny new toys!

-Zach

Image result for CIS army

The Confederacy of Independent Systems (CIS)

Speaking of shiny toys, the CIS faction officially releases to the general public this September. Seeing as it’s still August, much of this information will be gleaned from proxying, TTS play, and reports from those who purchased a GenCon Core Set. The CIS function in a min/max manner, which means that they have the cheapest of the cheap and the cream of the crop in one army. Interestingly enough, many of the droid army’s advantages and disadvantages are two sides of the same coin. As you will see, the CIS appear to be quite user friendly, and contains more advantages than disadvantages. However, just like Anakin blowing up the Trade Federation hub at the end of Episode I, when things go wrong, they go wrong quickly. Let’s dive in.

Pros

  • Cheap units
  • Elite units
  • Order control

The first advantage for the CIS is their cheap corp units. And when I say cheap, I mean 6 points a droid model cheap. And when you can stack eight of these models into a single squad for 62 points (including the heavy weapon), you can quickly build an army corp of 48 models. It takes most opposing units a long time to chew through 48 wounds of just corp units. There are two other advantages to having cheap corp units: disposability and list building space. Inexpensive, numerous corp units present an interesting dilemma for an opponent; do they spend the time trying to shoot through 48 healths worth of 6 point models, or do they focus on the opponents major pieces? However, this is a double edged sword, as ignoring 48 models can lead to a player being overwhelmed by sheer numbers for objective scoring.

The second advantage is list building space, with 6 properly outfitted corp squads coming in at roughly 392 points, leaving over half your points available for other units. This is in stark contrast with the phase 1 clone troopers, where a set of 6 outfitted troopers comes to roughly 480 points. This extra space is heavily needed for the CIS, because their commanders and heavy units pack quite a punch to the points wallet; General Grievous begins at 175, the AAT at 170, and Count Dooku at 205. However, these units are expensive for a reason.

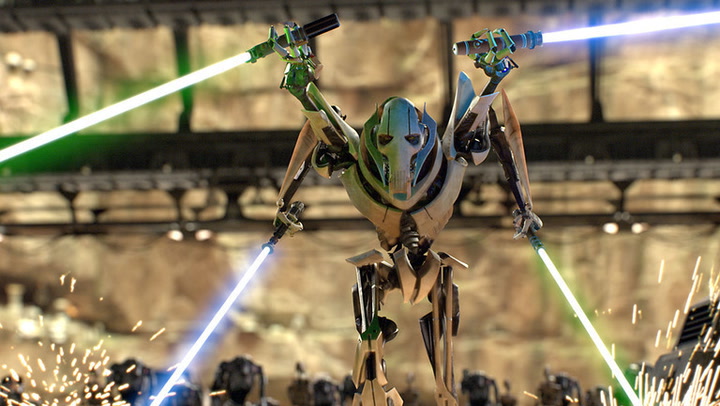
For the most part, expensive units in Legion tend to be elite, and the three main heavy hitters for the CIS fit the bill. Lets begin with General Grievous. Clocking in at 175 points base, a fully outfitted Grievous can walk onto the table at 208 points, a whopping quarter of your army. However, he packs quite a punch, with the ability to move across difficult terrain at will, and perform climb actions for free with his Scale ability. This ability proves useful when preparing to annihilate the enemy with his 1-pip command card, Trained in Your Jedi Arts. This card allows Grievous to perform an attack, with a special weapon, against every enemy unit within Range 1 of himself at the end of his activation. Oh, did I mention it’s Suppressive? Yeah, I’d be running from this monster too.

Image result for grievous 4 arm pose

Count Dooku and the AAT are no slouches either. A fully tooled up Dooku can max out at a ridiculous 250 points, putting him on par with the Emperor, his old master, in Legion scale. Dooku possesses two weapons with Pierce, both at range and in melee, and comes with a new keyword called Makashi Mastery, allowing him to reduce his pierce levels in order to remove the opponent’s ability to use Impervious or Immune: Pierce. The gentleman is a duelist, and he wants you to know it. The droid AAT tank begins its existence at 170 points, before adding on weapons to maximize its Arsenal ability. Capable of throwing multiple red dice out to Range 4 with High Velocity, which negates an opponent’s ability to spend a dodge token, there is no hiding from the guns of this tank. Clocking in with 9 Health, Armor, and red dice saves, it will take quite an effort to bring down this assault vehicle.

Presentation2

One of the most obvious advantages to playing the CIS army is their unique form of order control. The B1 Droid unit contains a keyword called Coordinate: Droid Trooper. This keyword allows a B1 droid to issue an order to another droid trooper whenever they are issued one themselves; effectively creating a chain of orders throughout your corp units. This ability is incredibly useful, and allows for a number of turns of perfect activation control for your army; let’s focus in on that.

Say you open up your core sets and build a list; let’s take Grievous, six B1s and two droidekas. Turn 1 you decide to play Assault, the generic 3-pip card. You issue orders to both droidekas, and one to a single B1. This B1 uses its coordinate ability and passes along the chain of other corp to get six total corp orders out. This leaves just the token for Grievous in your bag, allowing you to activate any unit whenever you want. Not bad right? You can do this multiple times per game. Order control is one of the fundamental skills that requires mastery to be elite in Legion, and the CIS army provides a number of shortcuts to attaining perfect control over your forces.

Cons

  • Top heavy reliance
  • Potential chaos
  • Poor dice

As I mentioned earlier, many of the CIS’s advantages also reflect their greatest disadvantages. While the droid corp units are numerous and inexpensive, they tend not to do a whole lot offensively. This leaves the burden of enemy unit removal to their heavies and commanders, which has two main downsides. The first is that it’s predictable. While Grievous may be hard to pin down, it becomes apparent very early on where he wants to unleash his trophy lightsabers. Once this target area is identified, the defending player can begin to prepare a response with the rest of their army in an attempt to mitigate or even prevent his assault. The second downside is dice variance. When most of your points are tied up in one unit, a single bad roll can wreck even the best plans. If a defensive roll ends up cold and Dooku drops to a single shot, the CIS are often left hanging in the breeze.

We touched on the coordinate keyword possessed by the B1 droids earlier, but that is not the only keyword they possess. Remember when I said action control is essential? Well, if the opponent denies your droids an order token, your activation control turns to activation chaos. They also contain AI: Attack. This keyword means that if a droid trooper does not have a face up order token, their first action must be an attack. That exhaustible, Range 4 rocket launcher you were saving for the advancing enemy tank? You just shot at an enemy squad in heavy cover with it and only it. Not only is this a negative as it derails your plans, but it also means you cannot move to eliminate cover first or take an aim, as the attack must be your first action. Keeping orders on your droids, especially your B1 corps, is essential to any kind of success with the faction. However, there is one small silver lining. If the unit does not have a face up order token, but cannot legally perform an attack, it keeps both actions as normal.

The final major disadvantage to the droids is their generally poor dice pools, especially in their basic corp units. For example, the B1 units throw both white dice for attack and defense, and neither die surges. Many of the other units do not have any native surges either, and if you do not play your command cards or green tokens correctly, they can lag behind the game’s other units in terms of dice consistency. Even the Droidekas and the AAT do not possess enormous dice pools, but rather rely on strength in numbers to overwhelm enemy defenses.

Strategy

We’re going to keep this short and sweet today. The general concept of the CIS army involves keeping your corp units within a range 1 ball of each other while your commanders and heavy units lead the charge from the frontlines. As touched on early, by maintaining that link between your corp units, you are able to issue orders with near perfect accuracy to your army, allowing you to react and provoke with any unit at any time, eliminating the luck aspect of drawing a token from your bag. Crucially, this also means that you will not be activating a high impact, elite unit at an inopportune moment. Seeing as most major pieces for the CIS are over 200 points, leaving them exposed is a quick way to certain defeat. However, these pieces are capable of single-handedly winning you matches, and for a more coherent, visual example of this I invite you to watch the TTS stream between TalkPolite and DrRizzle from the most recent round of the Yavin Base Team League. In this match, we are fortunate enough to be able to watch TalkPolite keep his corp in a cohesive ball, maximize his order control, and unleash chaos with General Grievous.

-Mike

We hope that over the last two weeks we have been able to give you some insight in the basic concepts of each of the four factions available in Star Wars Legion, and potentially provide some reasons for playing each faction. As of the current standing, the game is still quite balanced, and all four factions have a reasonable chance of victory when they deploy to the table. As remove further and further towards Worlds 2019, each of these factions should begin to splinter from their mirror faction and four cohesive identities and play styles will emerge. We as a community are currently looking for the next wave of players to establish themselves as the new experts on the GAR and the CIS, are you willing to step up to the challenge? Until next week, thanks for reading!

-Mike and Zach

Sportsmanship 101: Don’t be a Schmuck

General
Image result for star wars handshake
Alternate Star Wars Legion World: Han Solo shakes Wedge Antilles’ hand, presumably after Han pulled some Gunslinger shenanigans. He is truly, truly Sorry About the Mess.

Welcome back to the Jedha Journal! Now that tournament season is in full swing and Legion has officially moved into its Year 2 cycle, Zach and I thought it would be useful to put out an overview of sportsmanship in Legion and how it applies to everyone. We would like to casually discuss the topic without diving down the rabbit hole too much, but think it’s something that is worth at least brushing upon.

The easiest way to be a good sportsman in Legion, and really any game, is to know the rules and know the cards you brought with you inside and out. Simply knowing what you are playing with, and having the respect for your opponent to be knowledgeable about both your own and their own units, can prevent so many discussions, arguments, and inconsistencies before they even begin. Just think how much easier driving would be if everyone knew what to do….

I want to give a quick kudos to Jay from The Fifth Trooper for this next point, as anyone who listens to Jay’s casts knows that he is a huge proponent of this idea. Narrating your actions is the best way to preemptively halt an argument from beginning. Think back to the last time you had a disagreement with another Legion player; it probably went somewhere along the lines of “Hey, that wasn’t range 3 before!”, didn’t it? By talking through all of your movements, actions, and ranges, you are able to keep the game-state as accurate as possible, and have a more enjoyable playing experience with your opponent. This plays directly into the idea of being open about accidents. Everyone who has ever played a tabletop game has accidentally bumped a model or a piece of terrain. When this happens, it is the responsibility of the player to announce that something has been bumped and for both players to acknowledge this. By ensuring that both players understand and can fix any mistakes, arguments can be avoided and the game-state can remain legal and fun. This player discussion can also avoid the necessity of calling a judge for an issue that should never escalate.

There are two generic rules we would like to present on sportsmanship, and they’re potentially easy to understand yet the most common ones broken: don’t twist the rules, and don’t be a schmuck. Legion has quite a few rules, and even more exceptions, and it’s extremely likely that a newer or intermediate player does not have every single bullet point memorized. This is absolutely no excuse for a player to twist a rule or an interpretation for his or her own benefit. If you suspect something like this is happening, calling a judge is the very next action you should take. However, if there is a situation that arises that you are not one hundred percent confident about, there is nothing wrong with checking the Rules Reference Guide, asking your opponent for clarification, and attempting to find a compromise before calling the judge.

Knowing when to call a judge, as well as having the right mindset about it, can play a crucial role in sportsmanship. There is absolutely nothing wrong or impolite about calling a judge when a dispute or potential dispute arises, it is quite literally the only reason that person is at the event. The very first page of the new FFG Floor Rules documents reads, “It is the Judges’ duty to determine the proper resolution to any issues that may occur over the course of an event…”, pretty straightforward right? 

Next, and certainly not least, just don’t be a schmuck. Everybody reading this knows what kind of behaviors they don’t like to see across the table from them, so don’t be that person. If you think something you’re doing would cause another player to become agitated, resist the urge and act another way. Legion is still in its infancy as a community, and the negative connotation that comes with a lack of sportsmanship is a black mark we cannot afford to have. If there is one Golden Rule you take from this, it is such: Be the player who draws a new person into the game, and not the player that creates snarky internet comments. Remember: at the end of the day we’re pushing plastic toys that we assemble like the grown children that we are, from a Galaxy far, far away….that doesn’t even exist. Having fun is what Star Wars Legion is all about!

As readers of this small time blog, we’re sure you also listen to The Notorious Scoundrels. A few episodes ago they had an entire episode dedicated to this topic and brush upon it again this past week after some recent incidents. (No we will not go into details about it nor should anyone else. If you have heard about it, use it as a learning experience.) One thing the Scoundrels brought up in this past episode is how to start off on the right foot with your opponent. This doesn’t need to be a stand off-ish thing right from the get go. Speak to your opponent like how you’d like to be spoken to. Get to know them. Ask them “we’re they’re from?”, “how often they play?”, “what’s their local scene about?”, “are you on the Legion Discord?” to try and put a face to a name. Things like this can go a long way in setting the tone for the rest of your match, potentially you’re entire day.

If you’re looking to practice your sportsmanship, there are two great events coming up, the London Grand Championship and the Canadian Grand Championship. The London GT runs from September 12-14thand includes a host of prizes for top 3, a swagbag for anyone who attends, and 32 custom tables made by Ellis Priestley and Nicky Myland. The Canadian GT, now being head-manned by the ever moving main judge Brendon Franz and World Champion Luke Cook, runs from August 24-25thand spots and prizes are filling up quickly. Both tournaments include tickets on the line for Worlds and will be fantastic experiences.

We hope that this rambling article has brought a basic understanding of how to act when attending a Legion event, and once again invite you to listen to the Podcast episodes listed above. As Legion continues to grow, we hope everyone reading can continue to grow our community in a positive light, and be the ambassadors that Legion needs. Luke, Alex, and all the staff at FFG have done a phenomenal job at engaging with the community, and its up to us to take that next step. Mike looks to be a good sportsman and have a great run tomorrow at the Maryland Rallypoint Qualifier! (No pressure) Until next time, thanks for stopping by the Jedha Journal!

-Mike and Zach

Jedha Jank: Vandor Dreaming

General
“And the pierce came a’rollin”

Welcome to our initial installment of Jedha Jank! In this series, Zach and I will attempt to come up with an off the wall, yet functional list. Once we’ve developed an idea, we’ll explain what specific tactic or gimmick the list excels at, in an attempt to make a case for why you should give this list a shot for your next casual gaming night.

Vandor Dreaming
Commanders 
Jyn Erso (130) + Duck and Cover (8) + Environmental Gear (3) + A-180 Rifle Config (0) = 141
Operatives
 Sabine Wren (125) + Recon Intel (2) + Electro Grappling Line (5) + The Darksaber (25) = 157
– Chewbacca (110) + Hunter (6) = 116
Corps 
 Fleet Troopers (44) + Scatter Gun Trooper (23) + Rebel Officer (19) + Environmental Gear (3) = 89
 3x Rebel Troopers (40) = 120
Special Forces 
 2x Rebel Commandos (60) + DH-447 Sniper (28) = 176

Total: 799/800 


This list involves a small, 9 activation strike force led by Jyn Erso, mainly supported by Sabine and Chewbacca. The concept as whole involves Jyn and Sabine running amuck behind and in-between the opponent’s lines while Chewie takes the main body of the force into the action. Jyn’s infiltrate combines nicely with Sabine’s natural speed 3, and the two ladies can quickly begin throwing bombs and small piercing shots to draw out opponents and put pressure on normally safe objectives. Oh, and there’s six units with pierce, and four of those shoot at range three.

Chewie takes the important task for the list. As anyone who has faced a competent Chewbacca knows, killing minis in his guardian bubble, especially when they’re in cover, can be a difficult task; as you tend to become crit reliant. Killing minis is important in Legion, even more so when those minis come equipped with pierce, sharpshooter, or giant dice pools. Full commando squads and fleet troopers bring all of that to the table. 

Hopefully the concept is quickly becoming clear. Chewie, Officer Fleets, and two Hunter Commando squads with snipers bring a tremendous amount of stopping power, and not much can stop that freight train once it starts (literally) rolling. By distracting the opponent and putting pressure on areas they consider to be safe with Jyn and Sabine, you can casually push your death ball up the board until its too close for your opponent to handle. The three naked rebel troopers function as objective grabbers and filler. They basically replace the triple snipers in most meta lists, so the order pool stays functionally the same. 

The best competitive features of this list arrive in its access to pierce and relatively easy order control. Placing orders on Jyn and Sabine goes a long way to giving you great timing. Because each of your heavy hitters has pierce and either sharpshooter or a double digit dice pool, going to the bag generally means that you will be able to draw enough firepower to do some heavy, piercing damage to an enemy unit. Additionally, having four corp tokens but only one true corp attack allows you to keep the fleets flexible with their activation timing, which is crucial considering their range two attack band.

In the build up to the Northeast Open, I ran this list about five times to get an idea of how it works. I was originally taking this in an attempt to win the Golden T-47 for the jankiest list, but decided to take a competitive list instead. I encourage you to try something in this vein for your next beer and pretzels event or casual local tournament; there is also a fun variant where Han, some upgrades, and a medic replace Sabine. One of the best parts of Legion is building a fun, thematic list that specializes in a dastardly tactic, and we will try to highlight some of these over the coming months. Feel free to comment with some of your favorite Jyn Jank lists, and share the ideas with your friends!

-Mike

Pure Pazaak: An Introduction to Bidding

Strategy

Image result for pure pazaak

To Bid or not to Bid, that is the ultimate question. Bidding in Star Wars Legion is simultaneously one of the most basic yet challenging aspects to building a list. At its core, bidding is simply determining how far below the maximum of 800 points you want to be. Your reward? The choice to either be the blue or red player, both of which come with their respective benefits and drawbacks. I will not be discussing bidding amounts, as this topic is in constant flux and has been covered previously in other blogs and podcasts.

Fight on Your Terms

The first and most obvious advantage of choosing blue player is being able to utilize the battle deck you brought with you. Running a Pathfinder and Han list? You want to guarantee that Recover the Supplies has the potential to be present. Choosing the right cards to bring with you is a topic in and of itself, and there’s a great Notorious Scoundrels podcast episode about this that I suggest you give a listen to!

Additionally, just knowing what cards are likely to turn over and what deployment options are available gives you a leg up in the game, and transitions nicely into the next benefit: picking the table edge.

When approaching a table you’ve never played on before, being able to choose the board edge gives you an advantage from the offset. Armed with the knowledge that most deployments begin in the bottom right corner for the blue player, you can help to mitigate your chances of being pinned down in a corner with no cover or even find that long sight line that overlooks the middle Key Position. Being able to avoid unfavorable deployments is a skill that can single-handedly save you losses when it matters most.

Turn Zero

Picking the battle cards and deploying your army in Legion is generally referred to as Turn Zero. As the blue player, once the cards flip over, you have the first choice to remove one of the active cards from play. Not only can this be useful in removing an early objective that would create a disadvantage for you, but it also presents an opportunity to engage in mind games with an opponent. Removing a card that your opponent does not expect or bluffing for a card in the third row can unnerve your opponent and potentially force he or she into a mistake.

Once the cards are decided and it comes time for objective and unit deployment, the next advantage appears. Being able to place the first vaporator or box allows you to screen out large areas of the board from your opponent, potentially pinning one of their vaporators into a corner or forcing them to place a box just a little too close to your army’s deployment. And speaking of deployment, as blue you get to put down the first unit. As I’ll discuss later, this is not always the best option, but a well infiltrated Pathfinder, or even Jyn if you’re bold, can give you a great option for an alpha strike or smash and grab on an objective.

Stalemates

One thing that will quickly become clear as you progress in your Legion career is that objective ties become commonplace in the higher tiers of play. When victory points (VP) are tied, the first tie breaker comes down to points destroyed, commonly referred to as MOV (Margin of Victory). However, if this score is tied as well, the blue player claims victory. This situation, or the threat of it, frequently comes into play on Sabotage the Moisture Vaporators. Because of the even numbered, defensive nature of the objective, it consistently ends in a VP tie, and forces the red player to push forward and make something happen, giving a huge positional advantage to the blue player. A wonderful example of this can be seen in the World Championship final match, which is available on FFG’s YouTube channel.

Not all is Blue

All of this is not to say that there are not significant advantages to claiming red player. The first, and most immediate, is having the final say on battle card selection. Because the selection process goes blue – red – blue – red, the red player has the option to make a final decision without fear of reprisal.

The larger advantage manifests once the cards are down and the minis start hitting the table. Deploying second allows you to react to placements by your opponent to ensure you have a counter for their placements and movements. Crucially, this also means you have a good chance of having the final deployment of the phase. This is a great opportunity for Pathfinder infiltrates, recon intel Deathtrooper advances, or pointing Luke or Boba towards an opponents weak flank.

Blue or Blue not, it’s not that Hard

There are a few simple guidelines to help streamline the choice of player color. If you approach a table and quickly realize one board edge presents a significant advantage, go blue. If you have Boba or Sabine and your opponent doesn’t, strongly consider blue to ensure Recover is an option. Basing your decision on battle deck choice holds especially true on off-kilter lists that have specific weaknesses to condition cards; for example, Flyboys probably don’t want Hostile Environment in the post Deathtrooper and Bossk world. Finally, if you expect your opponent is of a similar or higher skill level and a VP tie is likely, go blue to force them to be proactive.

Declining blue and choosing red can also be the right way to go. If you feel comfortable with starting on either board edge and want the option to choose the final card and deploy second, red works well. The final consideration for red vs. blue can also come down to activation count. If your opponent outnumbers you in activations, acting as the red player can allow you to avoid giving up multiple deployments in a row.

Recap

I hope this guide was a helpful introduction for the red-blue dilemma. The common theme of this, and most things in Legion, is to take every advantage that you can muster. If you have any further questions or want some clarification, there are tons of folks on The Legion Discord more than happy to help, so please come join us there!

Zach has been kind enough to allow me to come on board and continue to write for the Jedha Journal, and I look forward to answering any questions and interacting with you all in the future!


-Mike